Mes Workflows ComfyUI
Le titre parle de lui-même !
Ref2IAG — Éditer une image avec Flux 2 Klein et des références
J’ai travaillé sur un workflow ComfyUI très simple à utiliser pour l’édition d’image avec Flux 2 Klein.
Le workflow est entièrement documenté et traduit en français et en anglais directement dans ComfyUI, afin de pouvoir être compris et modifié facilement.
Ce que permet le workflow
Ce workflow permet de modifier une image principale à partir d’une ou plusieurs images de référence.
Vous pouvez utiliser :
1 image principale, celle que vous voulez modifier ;
jusqu’à 9 images de référence, utilisées pour guider le style, la composition, les détails, les personnages, l’ambiance ou certains éléments visuels.
Deux prompts positifs
Le workflow fonctionne avec deux prompts positifs.
1. Premier prompt
Le premier prompt sert à expliquer clairement ce que vous voulez modifier dans l’image principale.
Vous pouvez faire référence aux images directement dans le prompt :
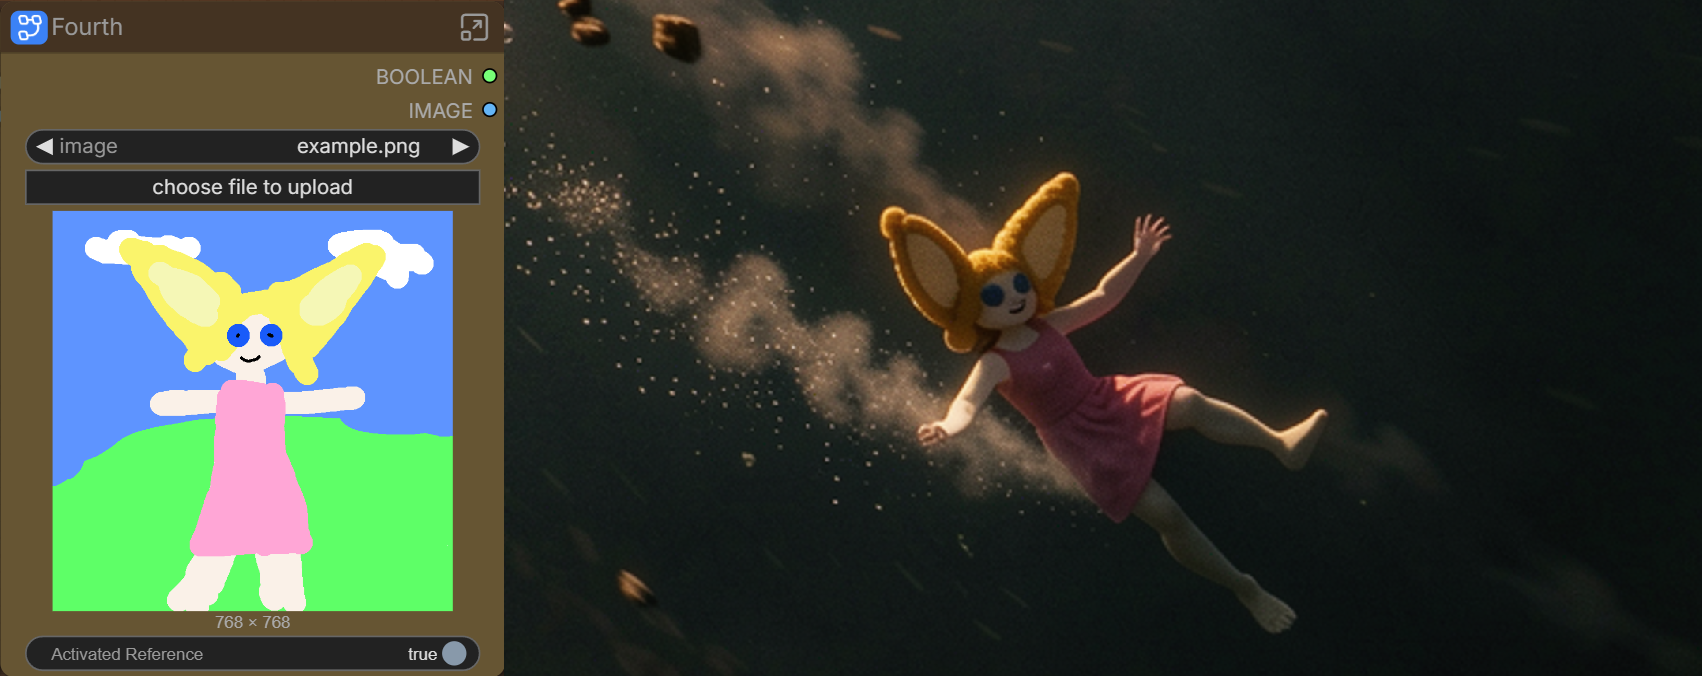
First Imagecorrespond à l’image principale ;Second Image,Third Image,Fourth Image, etc. correspondent aux images de référence.
Exemple :
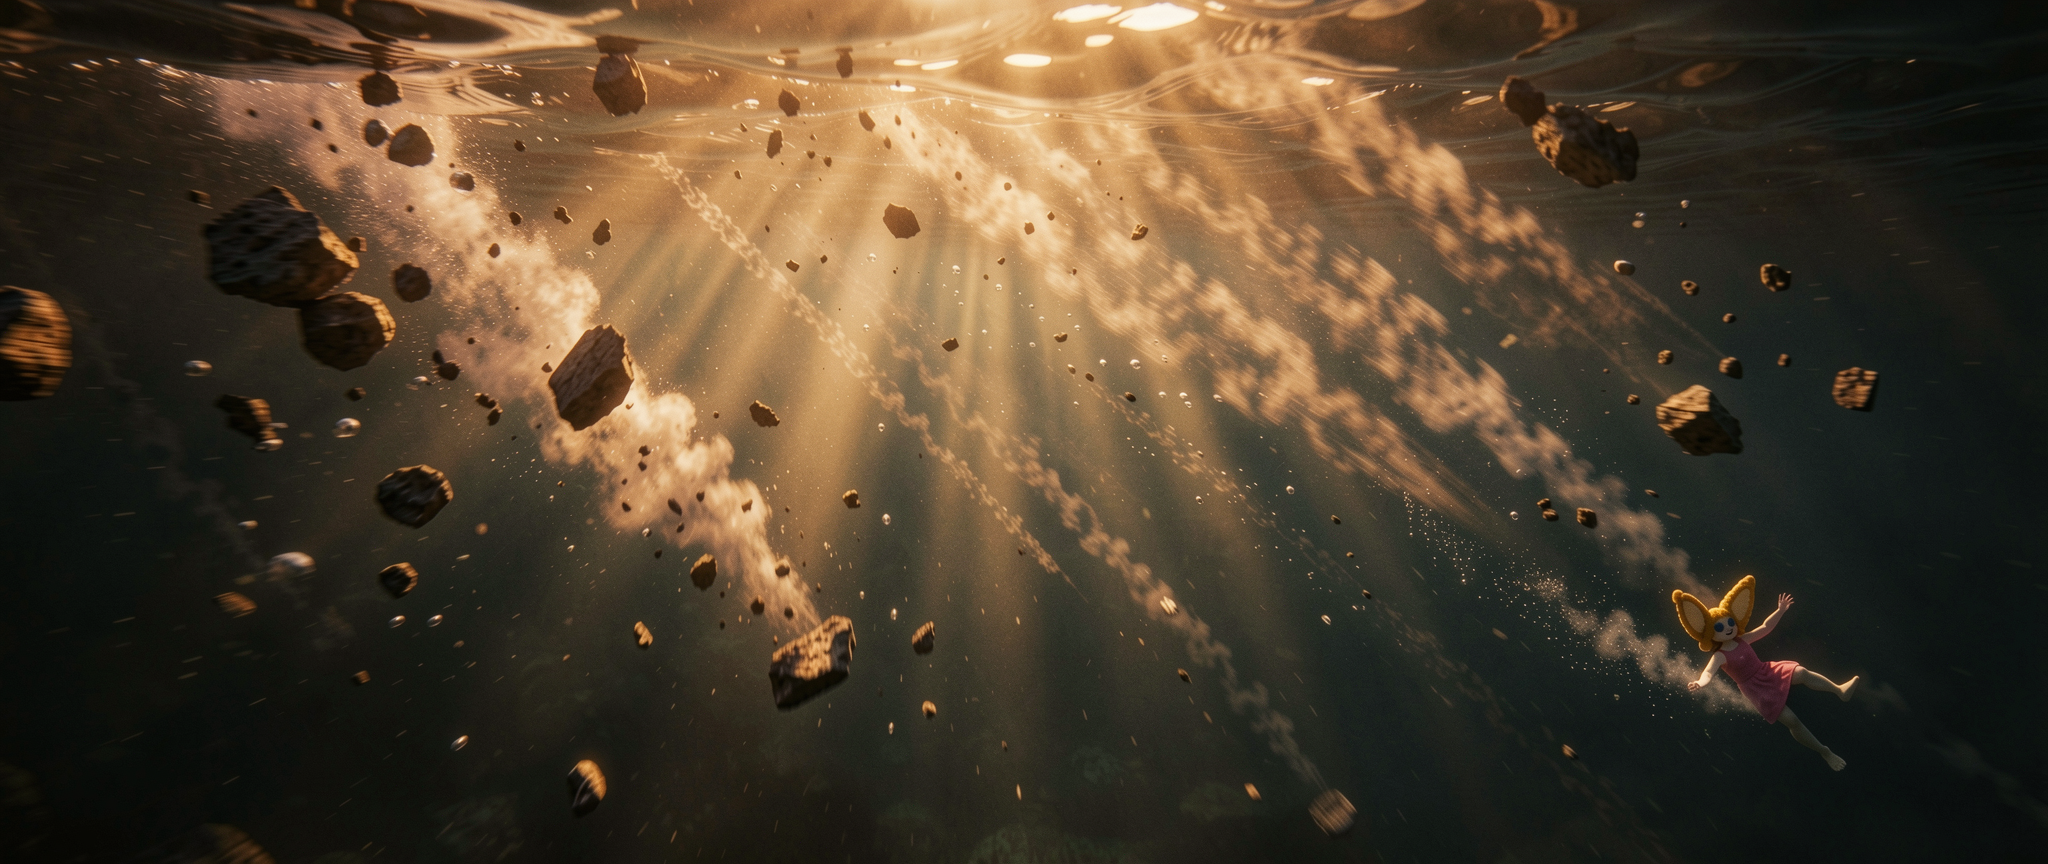
Transform the First Image into an underwater cinematic scene.
Keep the same composition, but use the lighting and mood from the Second Image.
2. Second prompt
Le second prompt sert à améliorer l’image générée lors de la première passe.
Il est surtout utile pour ajuster :
la lumière ;
le style ;
le rendu cinématographique ;
les couleurs ;
l’ambiance ;
les détails finaux.
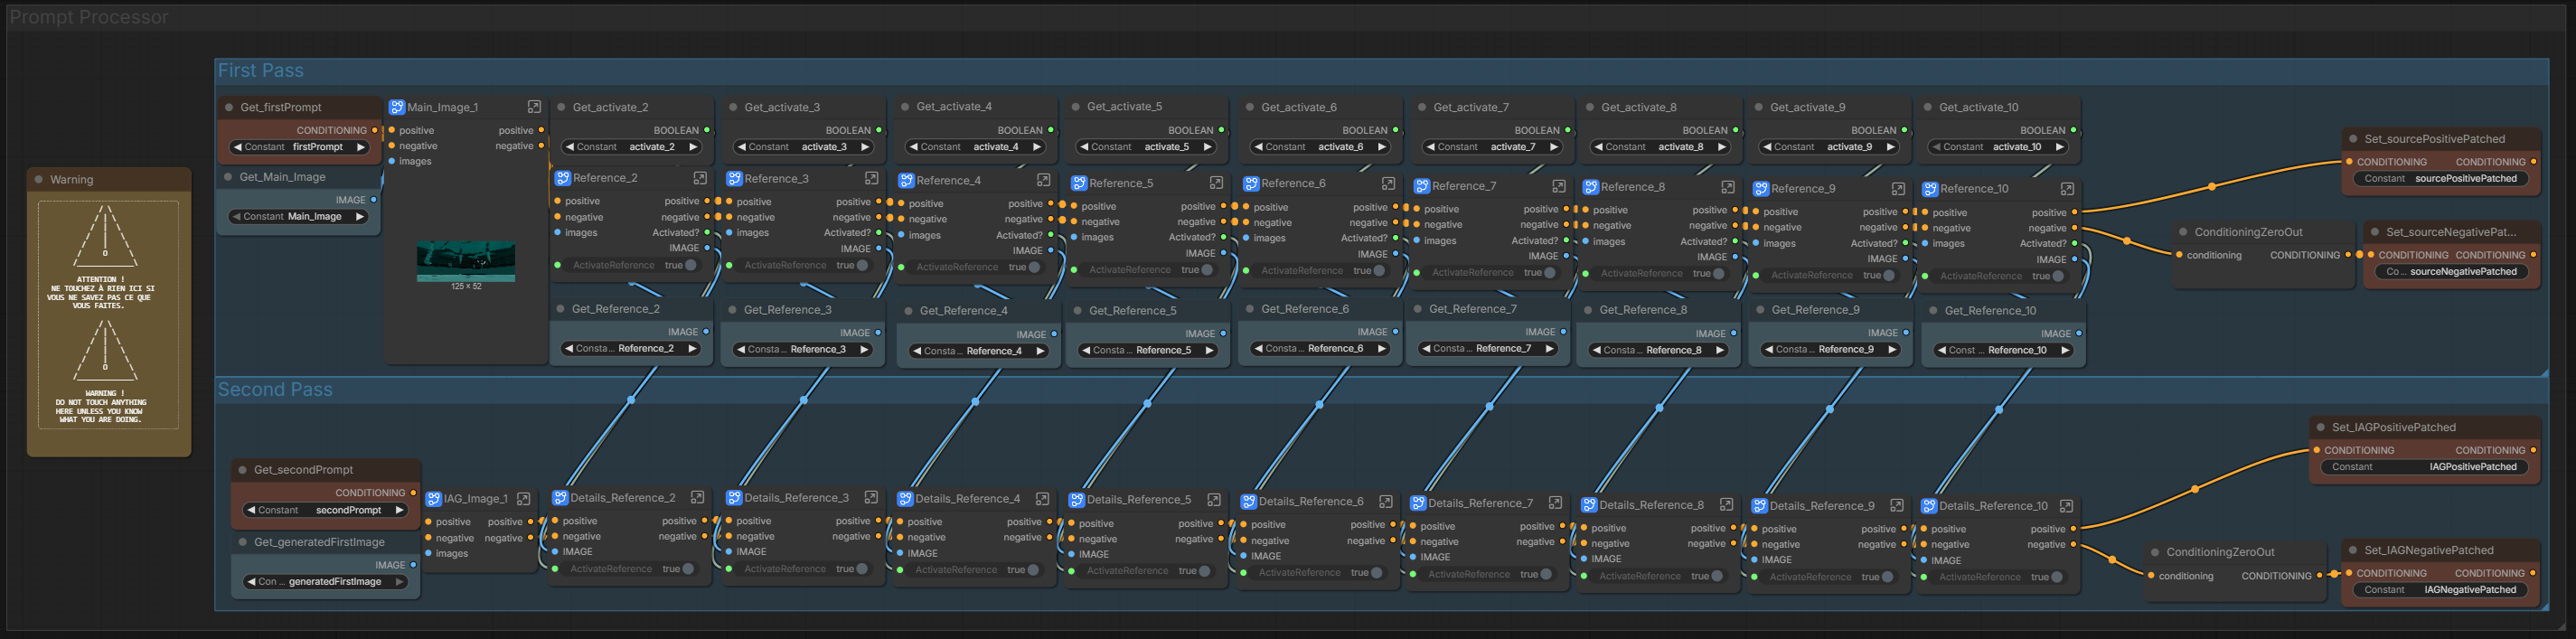
Attention aux références activées
Chaque image de référence possède son propre nœud d’activation.
Il est important de désactiver les références que vous ne voulez pas utiliser.
Par exemple, lors de mon test, j’ai oublié de désactiver la troisième image de référence, qui était un dessin de personnage. Résultat : l’image finale a remplacé mon personnage par celui du dessin 😬
Conseils d’utilisation
Les deux samplers peuvent descendre à 2 steps.
Dans mes tests, au-dessus de 4 steps, la différence devient assez faible. Cela permet donc d’obtenir des résultats rapidement sans trop augmenter le temps de génération.
Pour les images de référence, une taille autour de 500 à 700 px suffit généralement pour capturer les éléments importants. Plus une image est grande, plus elle peut avoir de poids dans l’image finale.
Vous pourriez aimer
// projets similaires